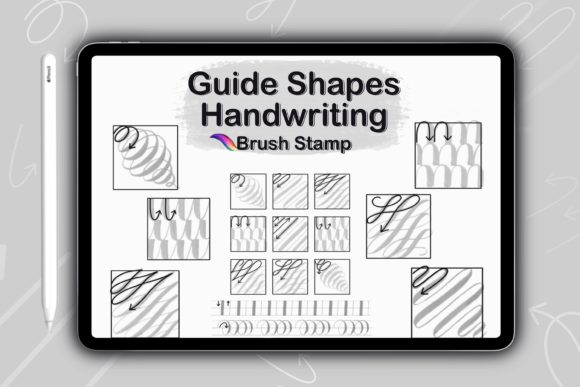
Integrating the 29 Shape Guide Handwriting for Lettering into Your Digital Design Workflow
In the evolving landscape of digital illustration and graphic design, efficiency often dictates the quality of output. For professionals ranging from freelance illustrators to small business owners creating marketing materials, the pressure to produce polished, hand-lettered content quickly is significant. This is where specialized assets like the 29 Shape Guide Handwriting for Lettering become essential components of a modern creative toolkit. Rather than serving as a mere shortcut, this digital resource functions as a structural foundation that streamlines the lettering process, ensuring consistency and professional aesthetics without sacrificing the organic feel of hand-drawn typography.
Understanding how to effectively integrate this tool requires looking beyond the asset itself and examining its role within the broader context of a design project. Whether you are designing wedding invitations, crafting social media graphics, or developing brand identity elements, the implementation of shape guides can significantly reduce the time spent on preliminary sketching and correction. This article explores the practical application of these brush stamps, focusing on workflow integration, technical compatibility, and strategies for maximizing their utility in Procreate on the iPad.
The Role of Shape Guides in the Creative Process
Hand lettering is traditionally a labor-intensive process that demands a high degree of motor control and spatial awareness. Even experienced calligraphers spend considerable time constructing underlying frameworks to ensure that letters are balanced, spaced correctly, and aligned. The 29 Shape Guide Handwriting for Lettering set addresses this bottleneck by providing pre-defined structural shapes that serve as immediate scaffolding for your text. By introducing these guides at the beginning of a project, you shift the focus from structural engineering to artistic expression.
These guides are particularly valuable during the initial planning phase of a design. Instead of starting with a blank canvas and struggling to visualize the composition, creators can select a shape that matches the intended mood or layout of the piece. This approach allows for rapid prototyping. You can test multiple compositions in minutes rather than hours, adjusting the scale and position of the guide until the visual balance feels right. This iterative process is crucial for entrepreneurs and marketers who need to A/B test different design concepts before finalizing assets for campaigns.
Enhancing Consistency Across Projects
One of the most challenging aspects of hand lettering is maintaining consistency, especially when working on multi-page documents or series of related graphics. Inconsistencies in slant, weight, or curvature can make a brand appear unprofessional. The shape guides act as a standardizing force. By using the same underlying structures across different pieces, you ensure that your typography maintains a cohesive visual language. This is particularly important for educators creating worksheet headers or bloggers designing consistent pin images for Pinterest. The guides provide a repeatable framework that helps maintain uniformity, even when the specific letterforms change.
Technical Implementation and Compatibility
Before integrating any new digital asset into your workflow, it is critical to understand its technical requirements and limitations. The 29 Shape Guide Handwriting for Lettering is designed specifically for the Procreate app on the iPad. It is not compatible with Photoshop, Illustrator, or other desktop-based design software. This specificity is both a limitation and a strength. By optimizing for Procreate, the brushes leverage the Apple Pencil’s pressure sensitivity and tilt features, offering a natural drawing experience that mimics traditional media.
To begin using these tools, you must first ensure your hardware and software are ready. You will need an iPad equipped with an Apple Pencil and the Procreate application installed. The item is delivered as an instant digital download in a ZIP file format. Therefore, having a reliable file management system on your iPad is necessary. Many users overlook this step, leading to frustration when they cannot locate or extract the files. Ensure you have a file manager app capable of handling ZIP archives, such as the native Files app or a third-party alternative like iZip.
Installation and Setup Workflow
The installation process is straightforward but requires attention to detail to ensure the brushes function correctly. Once you have downloaded the ZIP file, follow these steps to integrate the guides into your Procreate library:
- Unzip the File: Locate the downloaded ZIP file in your Files app and tap to extract the contents. You should see the brush set file, along with an instruction manual and a ReadMe file.
- Import to Procreate: Open Procreate and navigate to the Brush Library. Tap on any existing brush set to open the menu, then select "Import." Navigate to the extracted brush file and select it.
- Organize Your Library: Create a dedicated folder for your lettering assets. This organizational habit saves time in future projects, allowing you to quickly access the shape guides without searching through unrelated brushes.
- Review Instructions: Take a moment to read the included instruction file. It may contain specific tips on brush settings or recommended canvas sizes that optimize performance.
Proper organization is key to long-term usability. As your library of digital assets grows, clutter can hinder productivity. By categorizing your brushes logically—such as separating shape guides from texture brushes or ink pens—you create a streamlined environment that supports focused work.
Practical Applications and Workflow Integration
The versatility of the 29 Shape Guide Handwriting for Lettering lies in its transparent backgrounds and adaptable nature. These stamps are not rigid templates; they are starting points. Because they have transparent backgrounds, you can layer them over textures, patterns, or color gradients without obscuring the underlying design elements. This feature is invaluable for creating depth and interest in digital invitations and greeting cards.
Step-by-Step Usage in a Real-World Project
Consider a scenario where you are designing a digital invitation for a corporate event. Here is how you might integrate the shape guides into your workflow:
- Selection: Choose a shape guide that complements the formal tone of the event. A structured, geometric guide might work better than a loose, organic one.
- Placement: Drag the guide onto your canvas and resize it to fit the desired layout. Use Procreate’s transformation tools to adjust the angle if necessary.
- Layer Management: Lower the opacity of the guide layer. This allows you to see the guide clearly while drawing over it, but ensures it does not interfere with the final visibility of your lettering.
- Lettering: Create a new layer above the guide. Using a standard ink or calligraphy brush, trace over the shape guide. The guide ensures your letters are evenly spaced and proportioned.
- Refinement: Once the lettering is complete, hide or delete the guide layer. Add your own textures, colors, and embellishments on separate layers to customize the look.
This method allows for rapid iteration. If the client requests a change in style, you can simply swap out the shape guide and re-letter the text, saving hours of reconstruction time.
Maximizing Creativity Within Constraints
While guides provide structure, they should not stifle creativity. The 29 Shape Guide Handwriting for Lettering set is designed to be flexible. Users are encouraged to experiment with different brush combinations, colors, and textures. The transparent nature of the stamps means they can be overlaid with watercolor effects, grainy textures, or bold solid colors to match specific brand guidelines or aesthetic preferences.
For educators and content creators, these guides can also serve as teaching tools. They demonstrate proper letter formation and spacing, helping students understand the mechanics of good typography. By analyzing how the letters fit within the shapes, learners can develop a better eye for design principles, which they can eventually apply without the need for guides.
Quality Control and Long-Term Value
Investing in high-quality digital assets pays dividends over time. The 29 Shape Guide Handwriting for Lettering is a handmade item, crafted with attention to detail that mass-produced fonts often lack. This human touch ensures that the resulting lettering retains warmth and character, avoiding the sterile look of automated typefaces. However, to maintain this quality, users must practice good digital hygiene. Regularly backing up your Procreate files and keeping your brush libraries organized ensures that these tools remain accessible and useful for years.
Furthermore, understanding the limitations of the tool is part of quality control. Since these brushes are exclusive to Procreate on iPad, users must plan their workflows accordingly. If a project requires vector outputs for large-scale printing, additional steps will be needed to convert raster-based Procreate files into vector formats using other software. Being aware of these downstream requirements prevents bottlenecks later in the production process.
In conclusion, the 29 Shape Guide Handwriting for Lettering is more than just a collection of digital stamps; it is a workflow enhancer that bridges the gap between amateur effort and professional polish. By integrating these guides into your creative process, you can achieve greater consistency, speed up production times, and elevate the visual quality of your digital projects. Whether you are a seasoned designer or a hobbyist looking to improve your lettering skills, this tool offers a practical, efficient path to better results.